
Bit by bit: How to Break Down a Duck For Dry-Aging and Confit
Separating an entire duck follows similar essential strides as another poultry butchery. Assuming that you’ve brought down a chicken or turkey previously, you’ll definitely approve of ducks. Furthermore, assuming you’ve never handled cutting up a bird, have confidence that it’s a strategy worth learning and it’s actually very simple.
The very first work I had in a café kitchen was as a prep cook in high-end food, Italian-roused eatery in Boston, where the gourmet expert, Jody Adams, was renowned for her dish duck. I was basically as green as cooks come when I entered that kitchen and needed to separate two instances of ducks each and every other day. The way that a youngster with no genuine kitchen experience was trusted to separate costly birds for the top-selling dish on the menu ought to let you know how basic this undertaking truly is. Also, we have a lot of bit-by-bit photographs and recordings to direct you through the cycle.
Stage 1: Remove Neck and Wing Tips
Begin by eliminating the neck, assuming it’s actually connected (a few purveyors eliminate the neck and add it to the goodie sack containing the giblets and liver that ordinarily gets stuffed inside the pit of the bird). This is a decent assignment for breaking out a meat blade, yet a gourmet specialist’s blade or Japanese poultry blade will take care of business comparably well.
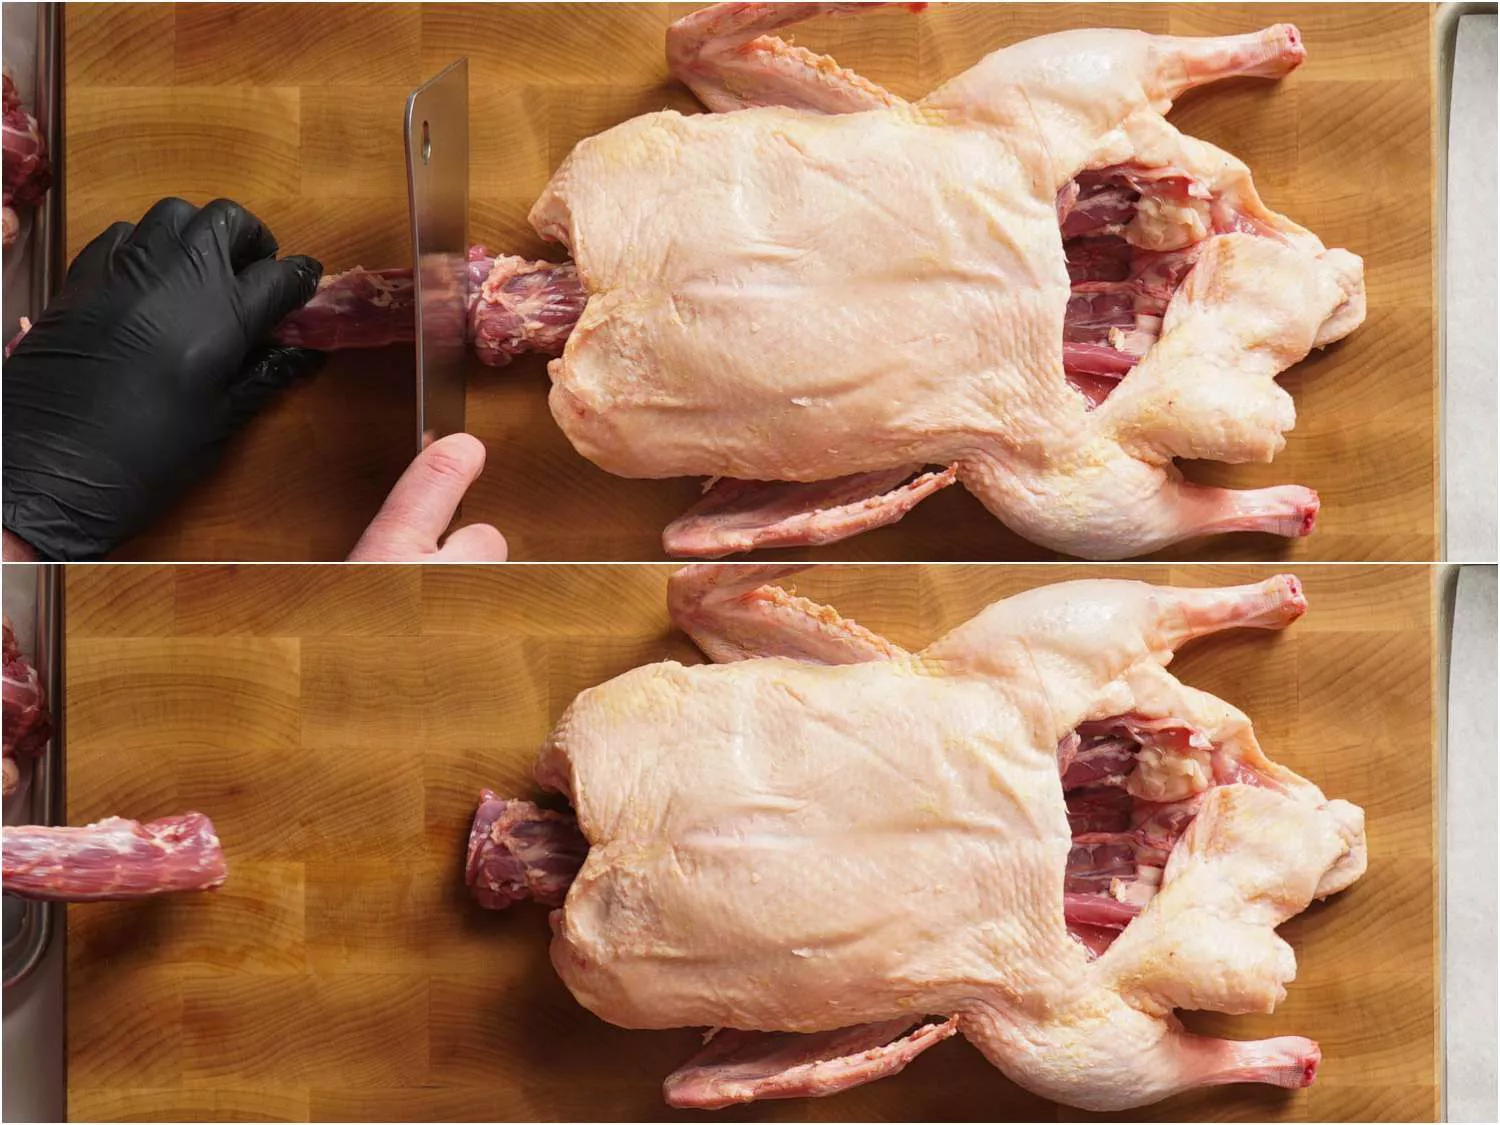
Try not to remove the whole neck; leave two or three inches of vertebrae actually appended. That piece will prove to be useful for when you hang the duck crown to dry-age later on.
Trim the wingtips by cutting the joint right at the wingtip. Likewise, with chickens, there is almost no useable meat on a duck wing tip, however, they are great for stock.
This is normally when you’d eliminate the wishbone however not this time. For this situation, it’s simpler to eliminate the wishbone after the duck crown has dry-matured in the ice chest — the meat around the wishbone will solidify and dry out somewhat during the maturing system, making it significantly more straightforward to remove the wishbone neatly without eliminating any bosom meat with it.
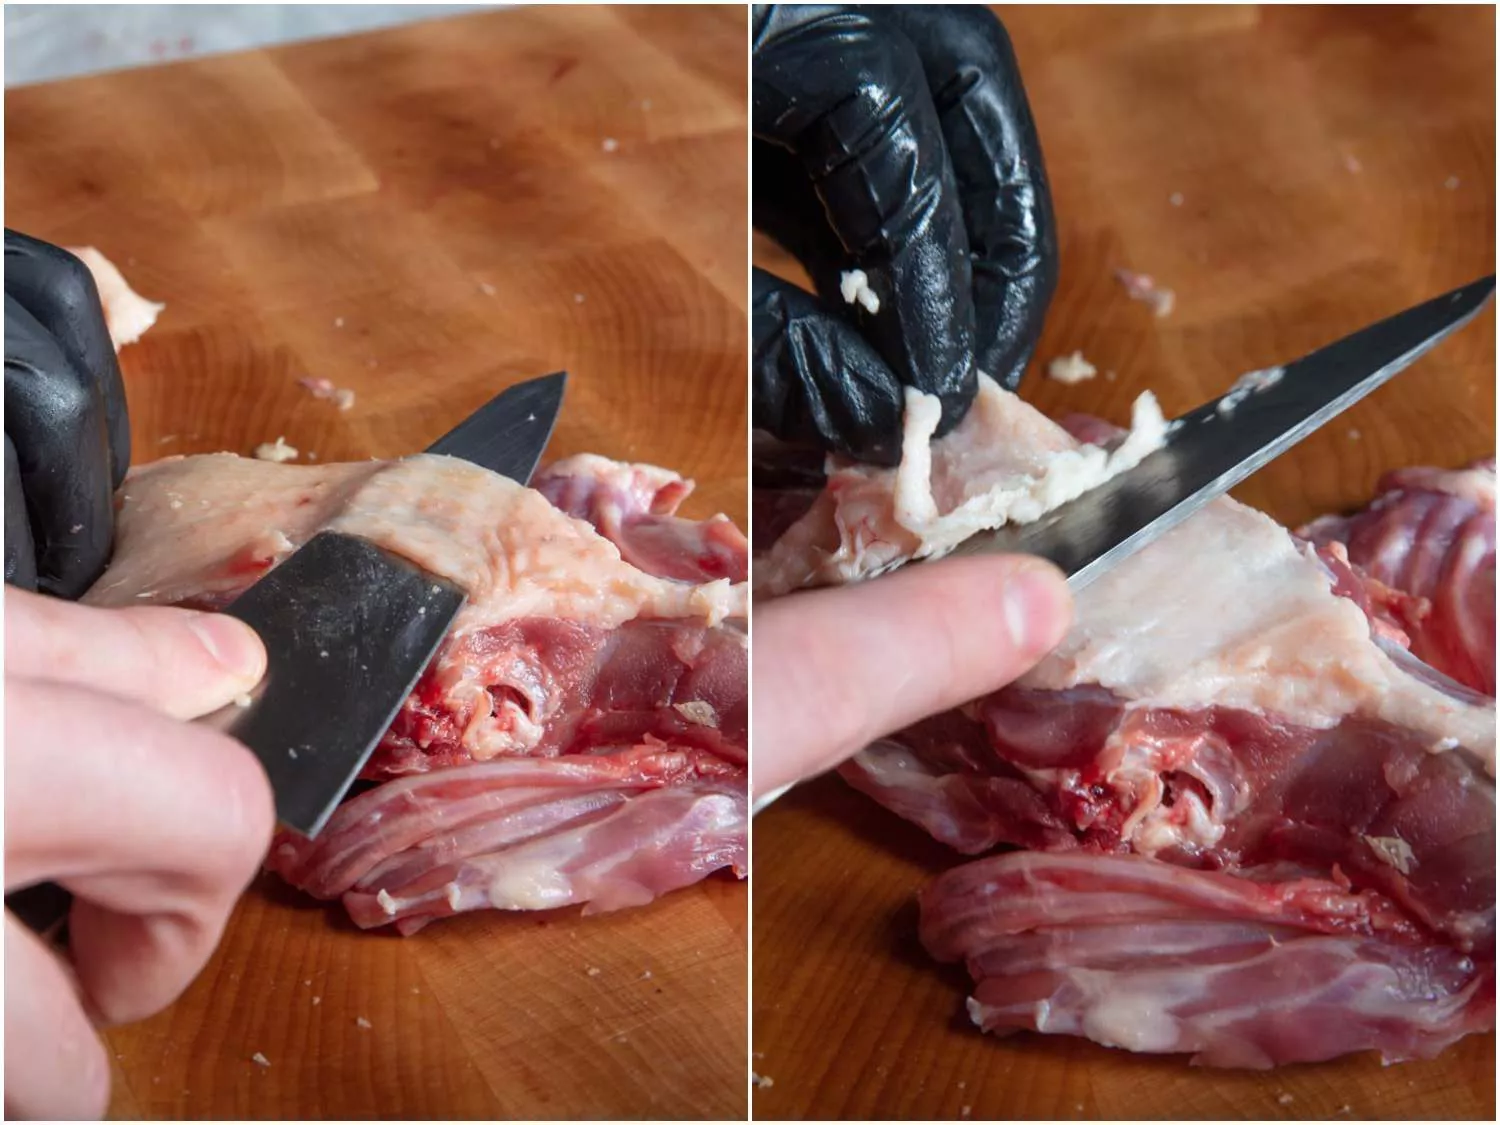
Stage 2: Trim Away Excess Skin and Fat
No mystery ducks have much more fat on them than chickens; it’s essential for what makes them so tasty. However, you would rather not be biting on all the fat a duck brings to the table, particularly when there are such countless ways of effectively utilizing its flavor in the kitchen — everybody needs more duck fat-cooked potatoes and sous vide duck confit in their lives.
So before you fire cutting up the bird into parts, require a moment to cut back away overabundance excess and skin from the neck and pit regions. All of the meat on the bird ought to in any case be covered by skin, so don’t move too forceful in cutting it back, remembering that skin seizes and shrivels up a little when cooked. Yet, you can remove huge bits of overhanging skin that aren’t safeguarding any meat.
Make a point to set up your prep station, so you have a sheet plate or compartments or the like by your cutting board for saving this abundance of fat and skin as well as bones and scraps for making duck stock.
Stage 3: Remove the Legs
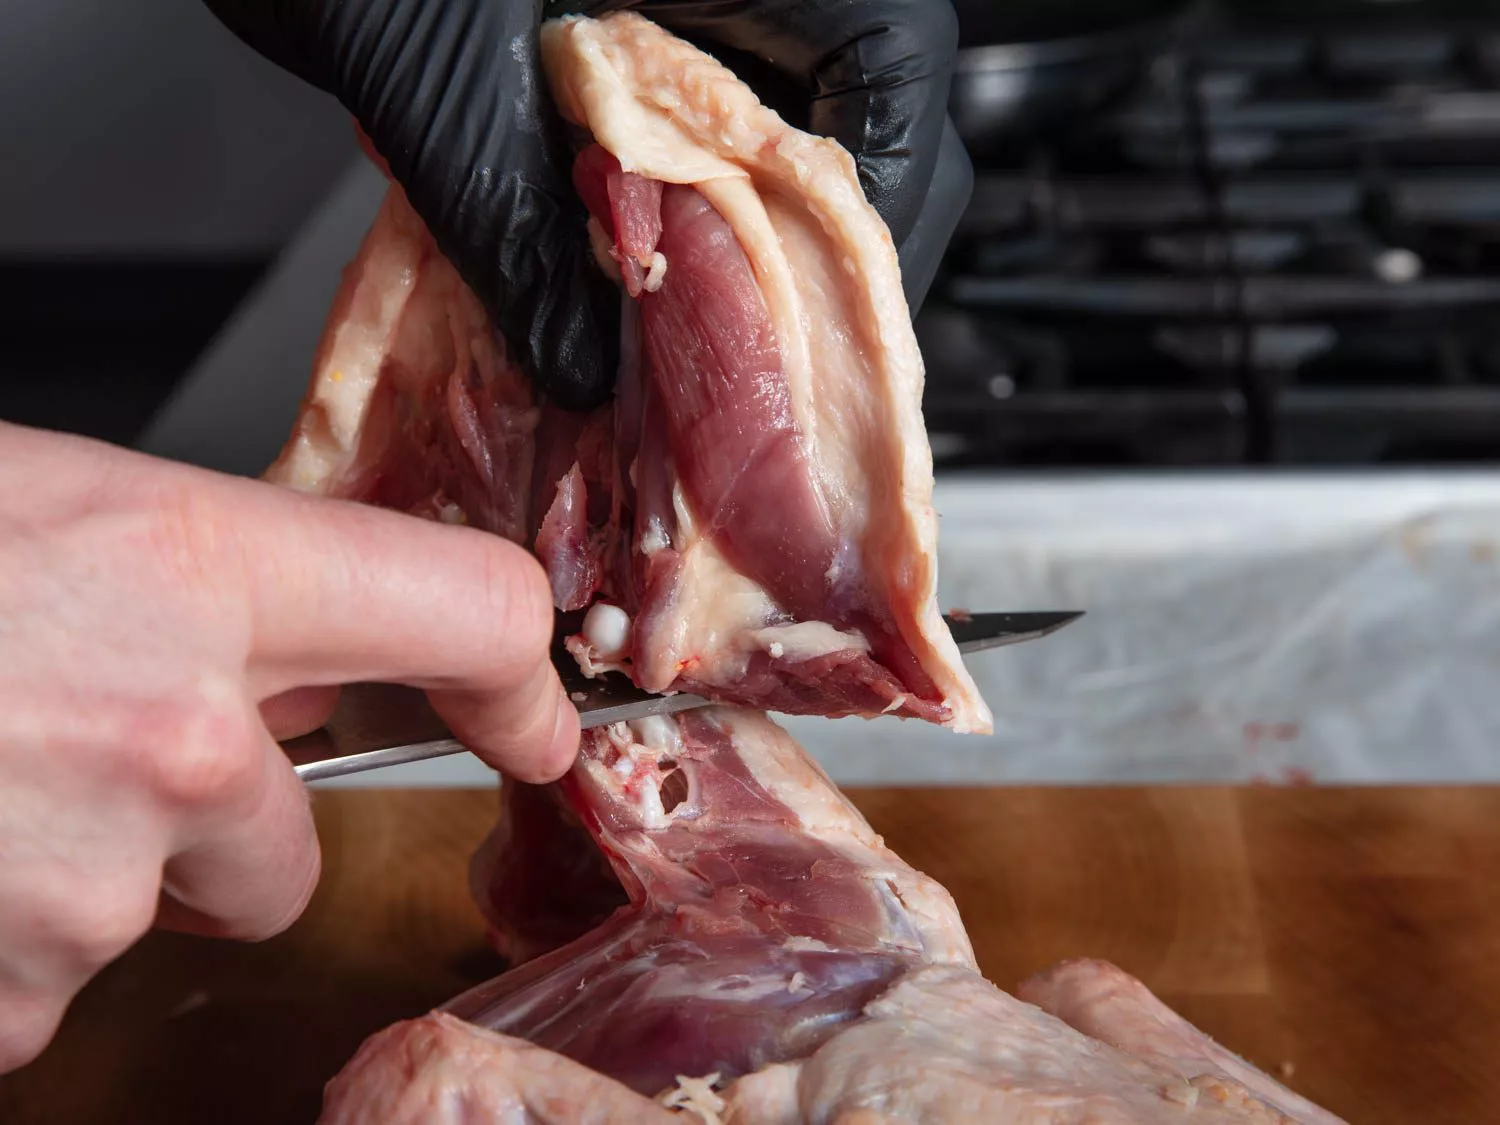
Managing the abundance of skin and fat from the hole makes it simpler to play out the main genuine butchering errand of this entire venture: eliminating the legs. In the event that you’ve at any point separated a chicken, the interaction here is something very similar.
Working with each leg, in turn, snatch the duck by the drumstick and pull the leg outward from the body until the skin is extended tight. Utilizing a sharp blade, slice through the skin between the leg and the body with light and smooth cutting movements; you’re simply hoping to slice through the skin and you would rather not puncture the tissue under.
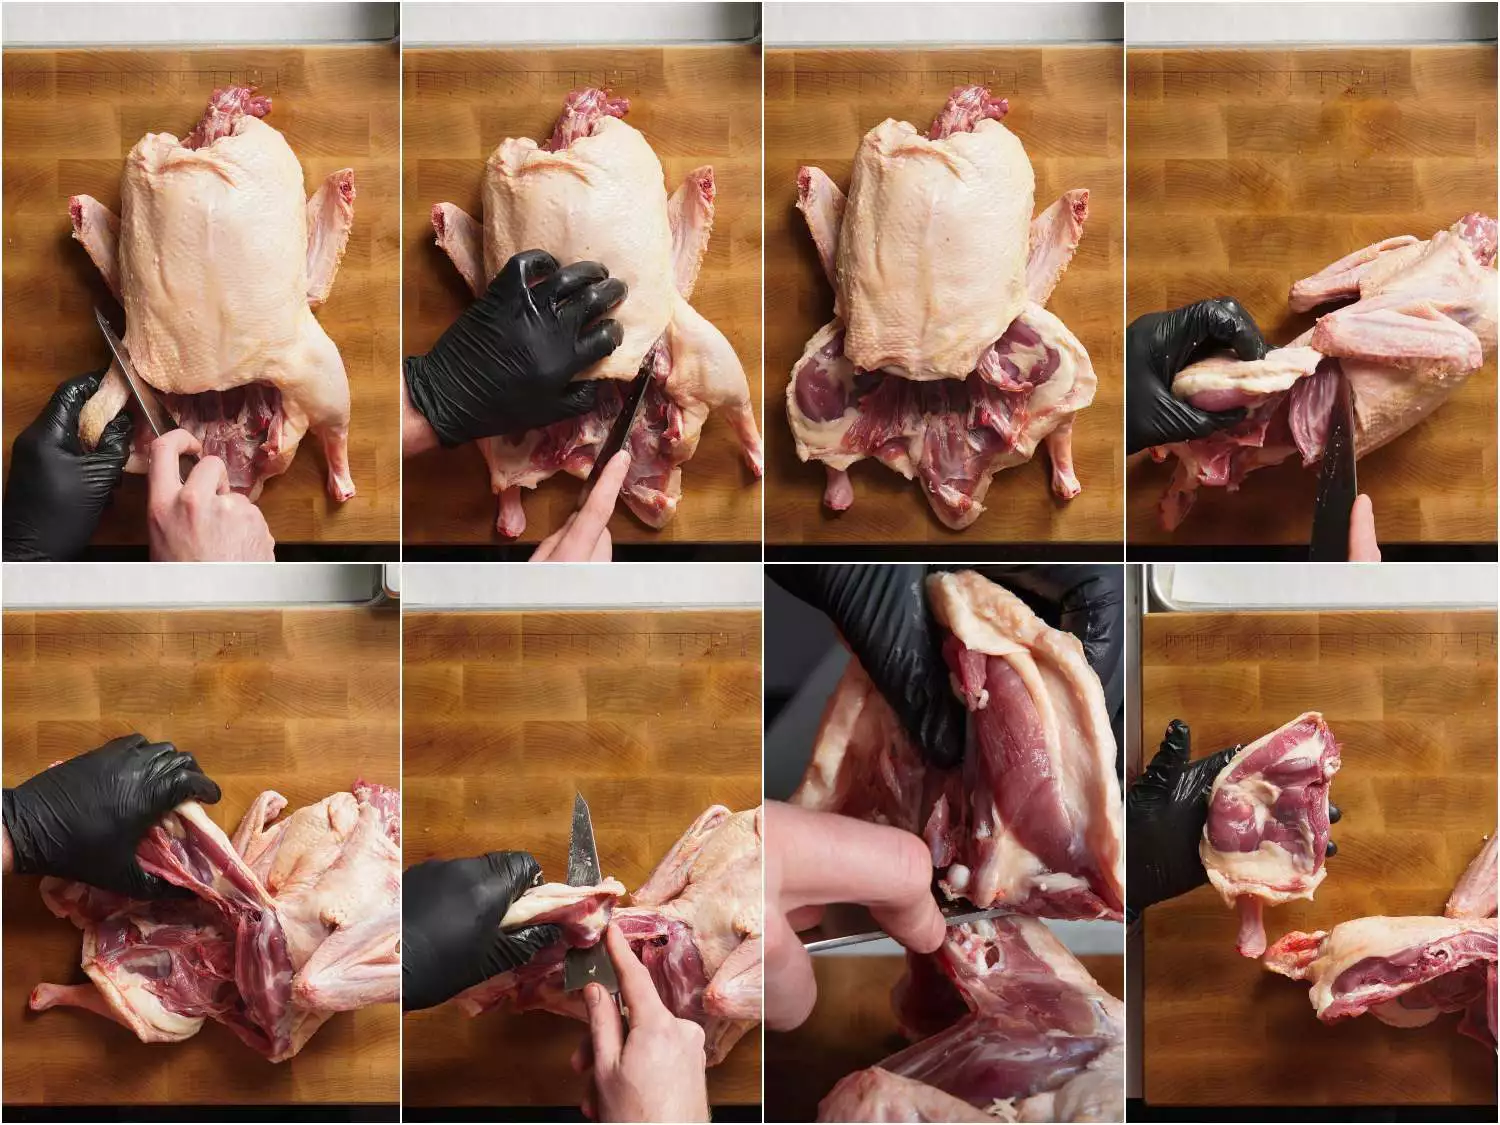
Flip the duck onto its side, so the leg you’re chipping away at is looking up toward you, with the legs pointing off on your left side and where the neck used to point to your right. Utilizing just your hands, snatch the leg you’re eliminating with one hand so four fingers lay on the skin-side of the leg and your thumb can immovably grasp the uncovered tissue side, kind of the manner in which you’d get a thick book. Then, at that point, while holding the body of the duck against the cutting board with your other hand, pivot the hand holding the duck leg forward, pulling up with your thumb, and solidly pushing back with your four fingers to pop the rotating conjuncture out of its attachment. The movement is like the one you’d use to turn a sock back to front.
Utilize your blade to eliminate the leg by slicing through the joint you recently uncovered, cutting around the shellfish, and riding the spine of the bird with your blade to ensure you amplify yield and leave no tasty leg meat on the corpse. Flip the bird back finished and rehash this cycle with the subsequent leg.
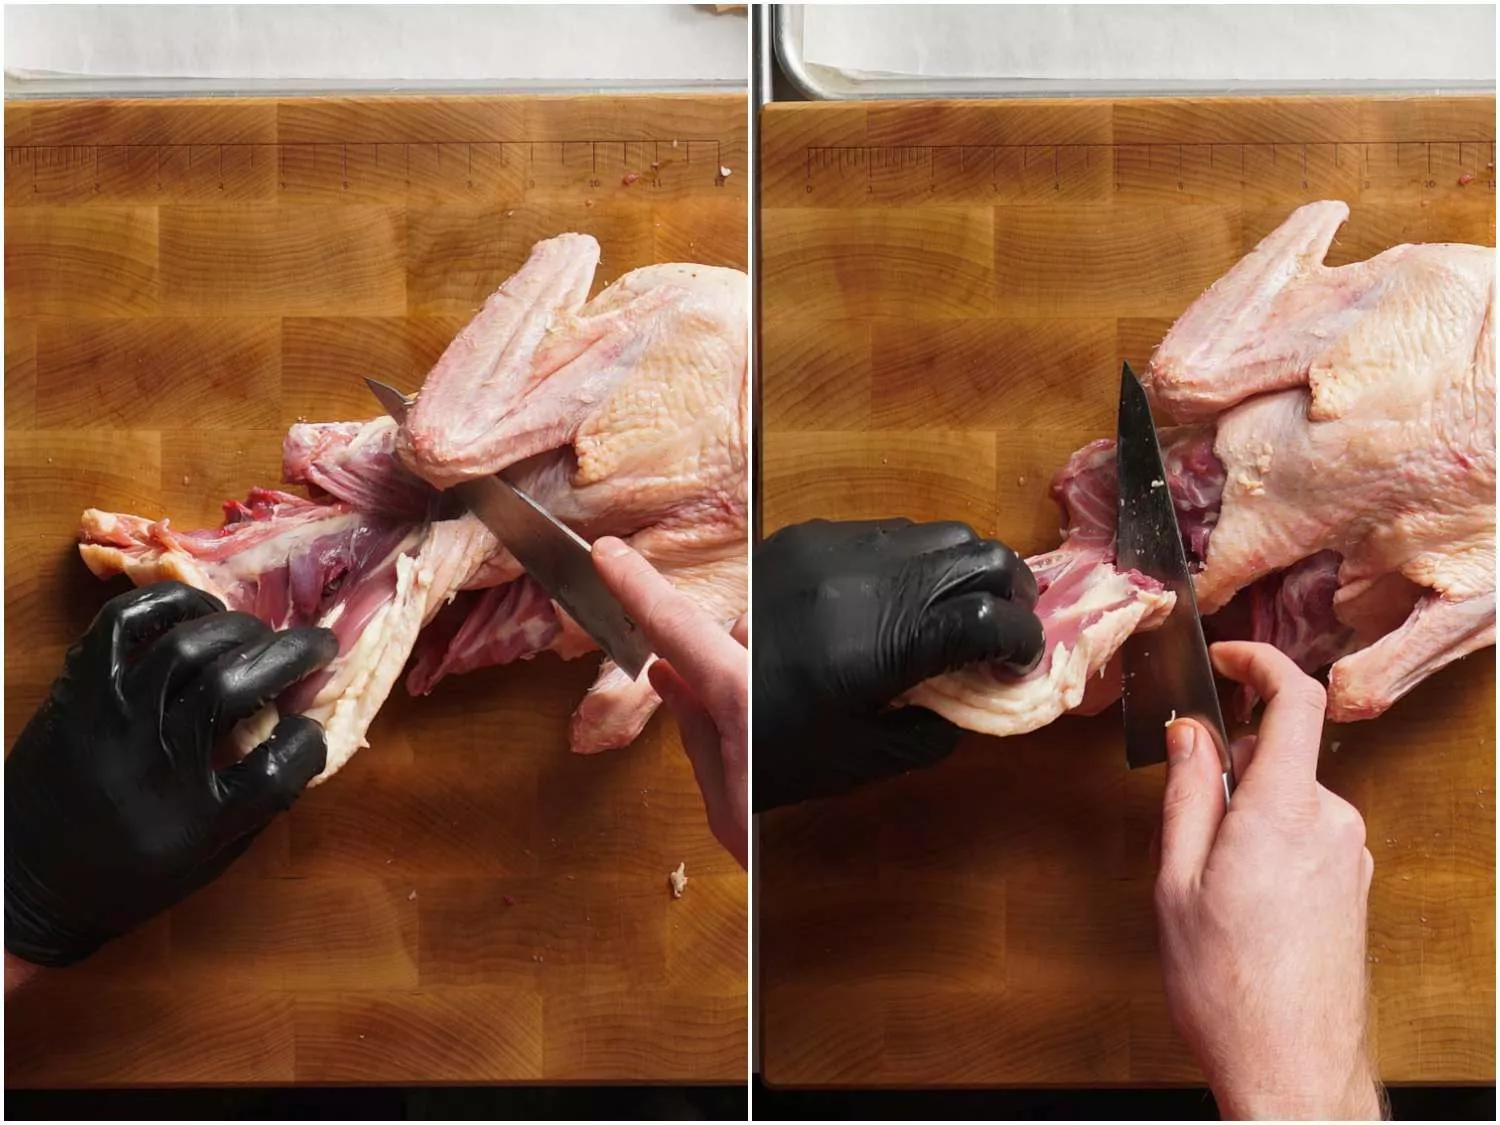
Stage 4: Crack and Remove the Back
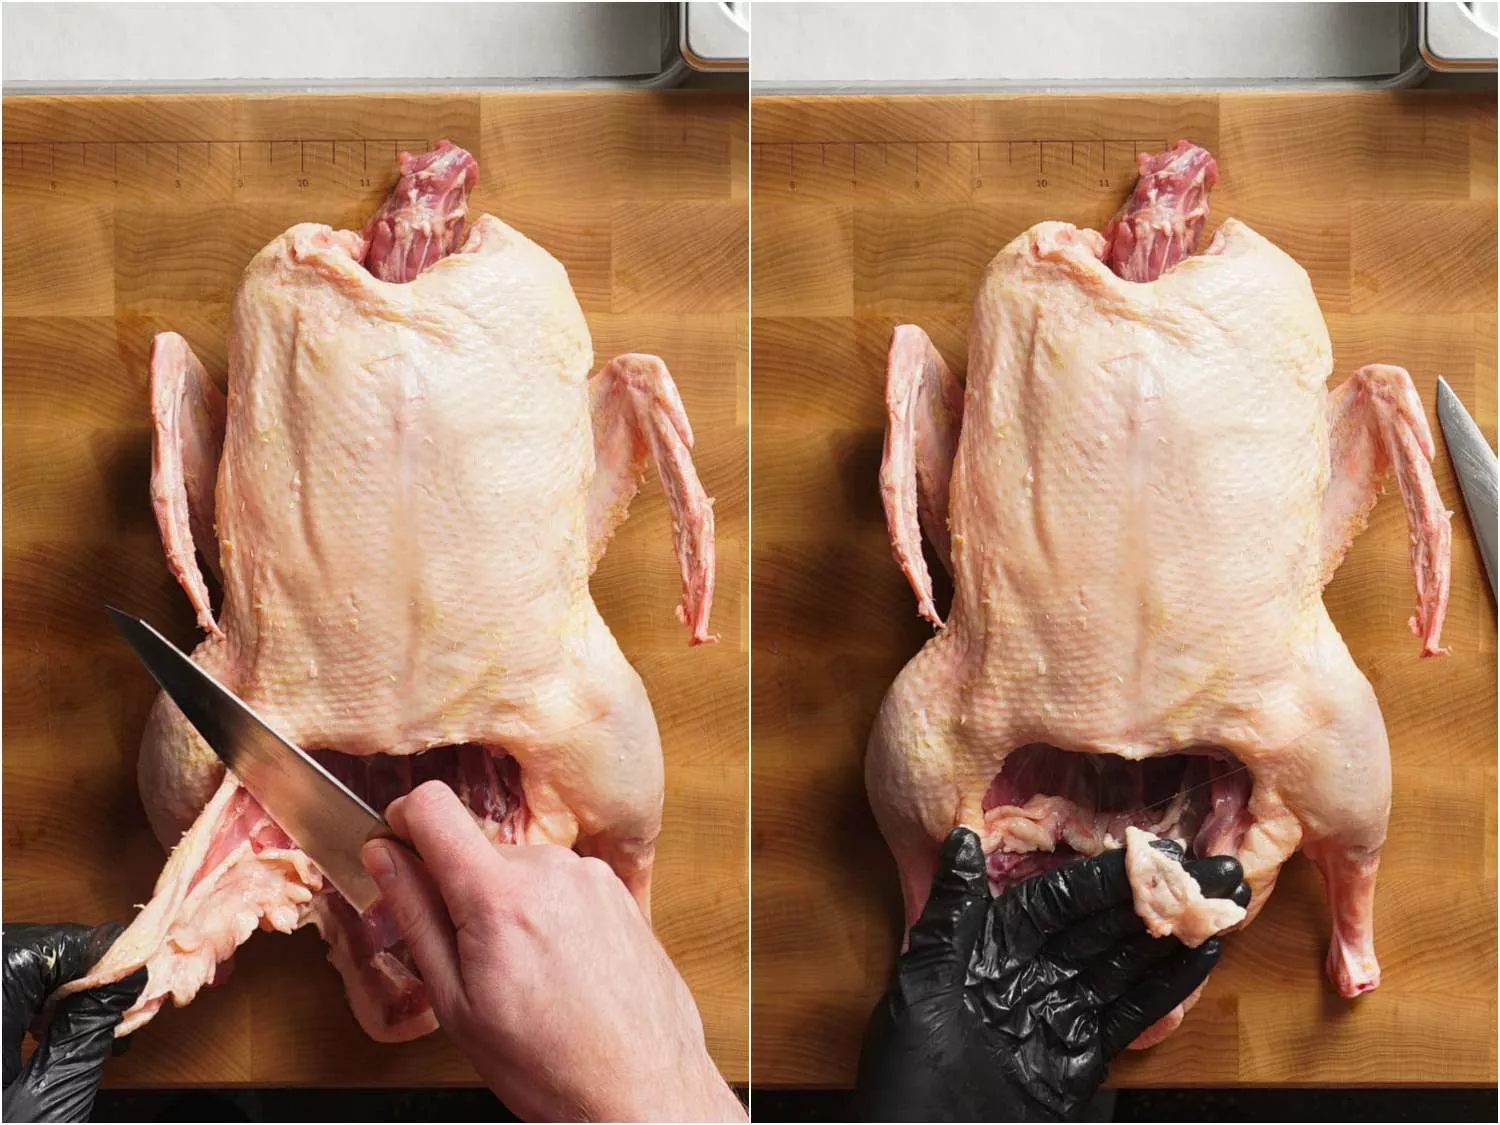
With the legs eliminated, it’s presently time to remove the vast majority of the spine, which will be utilized for stock. Position the duck on your cutting board upward, with the neck region flush against the barricade and the hole confronting.
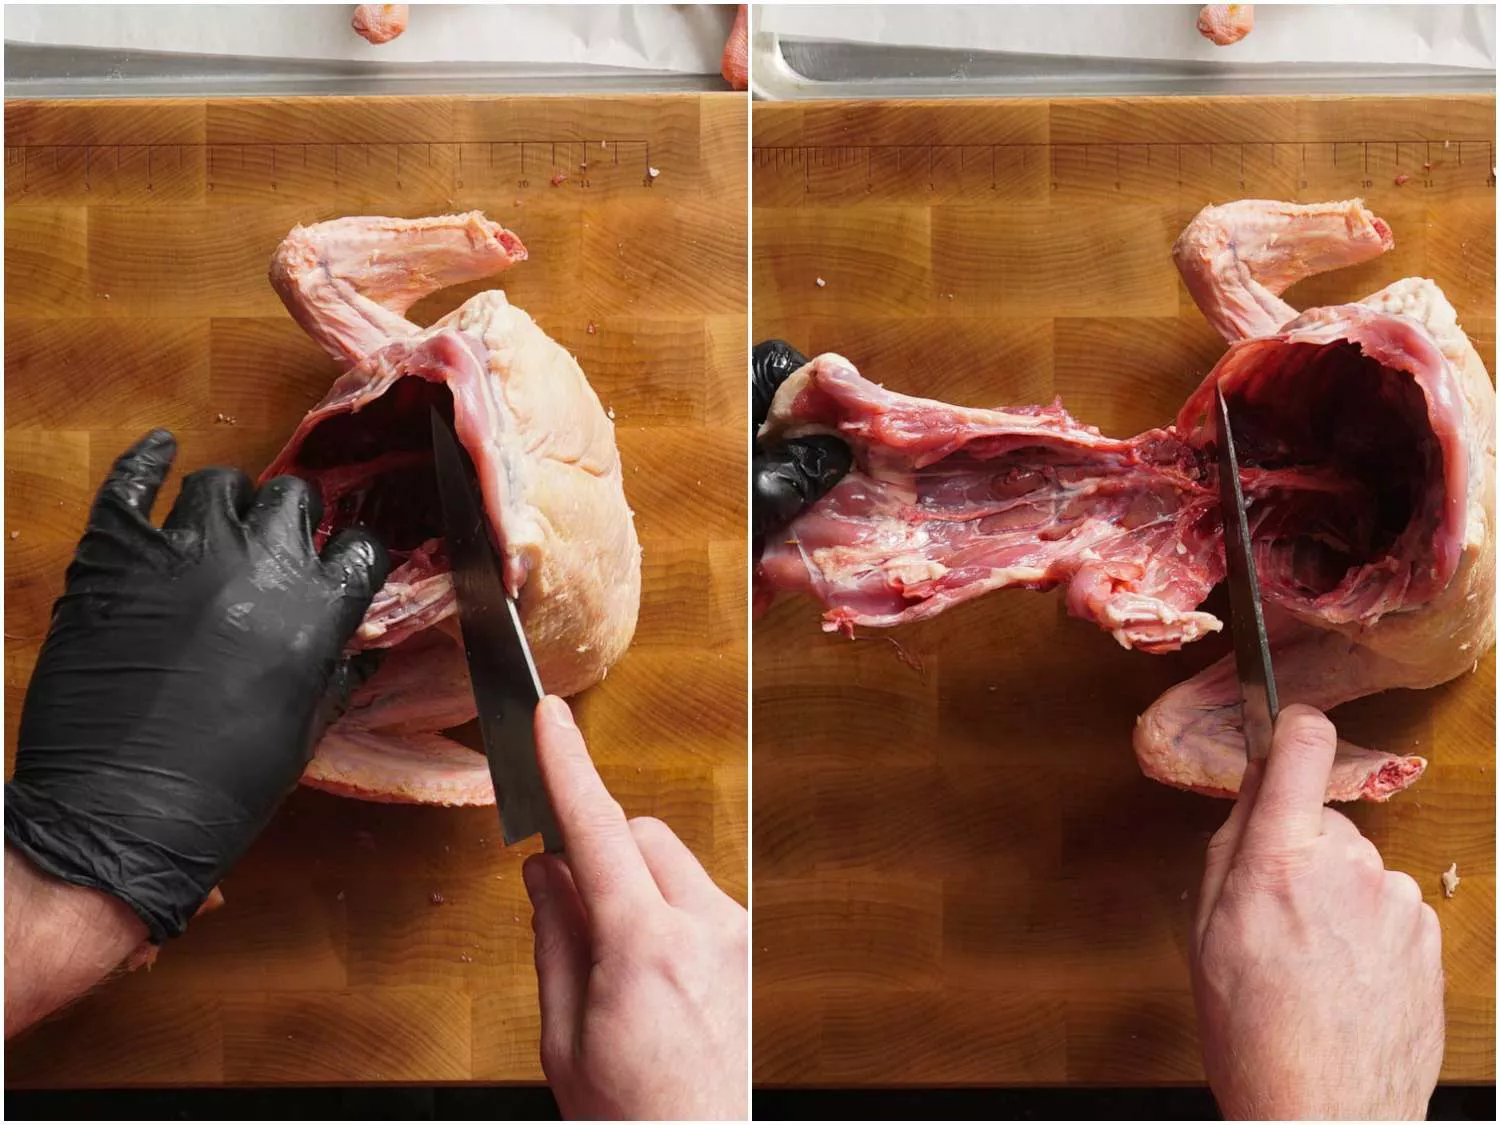
Hold and pull the spine down toward the cutting board with your non-predominant hand to break the duck’s back, then utilize your blade to remove the spine where it meets the rib confine. This is extremely simple to do with a honesuki, which is sufficiently deft to get between the vertebrae and slices through the spine and ligament effortlessly. Assuming you are utilizing a Western-style gourmet specialist’s blade, this errand is a smidgen trickier, however, you can constantly enroll the assistance of poultry shears or a meat knife on the off chance that you observe it’s giving you inconvenience. Once more, discard nothing — the back will be utilized for stock.
Stage 5: Trim Away More Fat
Since the duck crown will be kept entire to dry-age, that is all there is to it for butchering steps (no parting of the bosoms here), however, there’s still some last cleanup blade work to be done before we can move on making stock, delivering fat, restoring legs for confit, and balancing the crowns to mature.
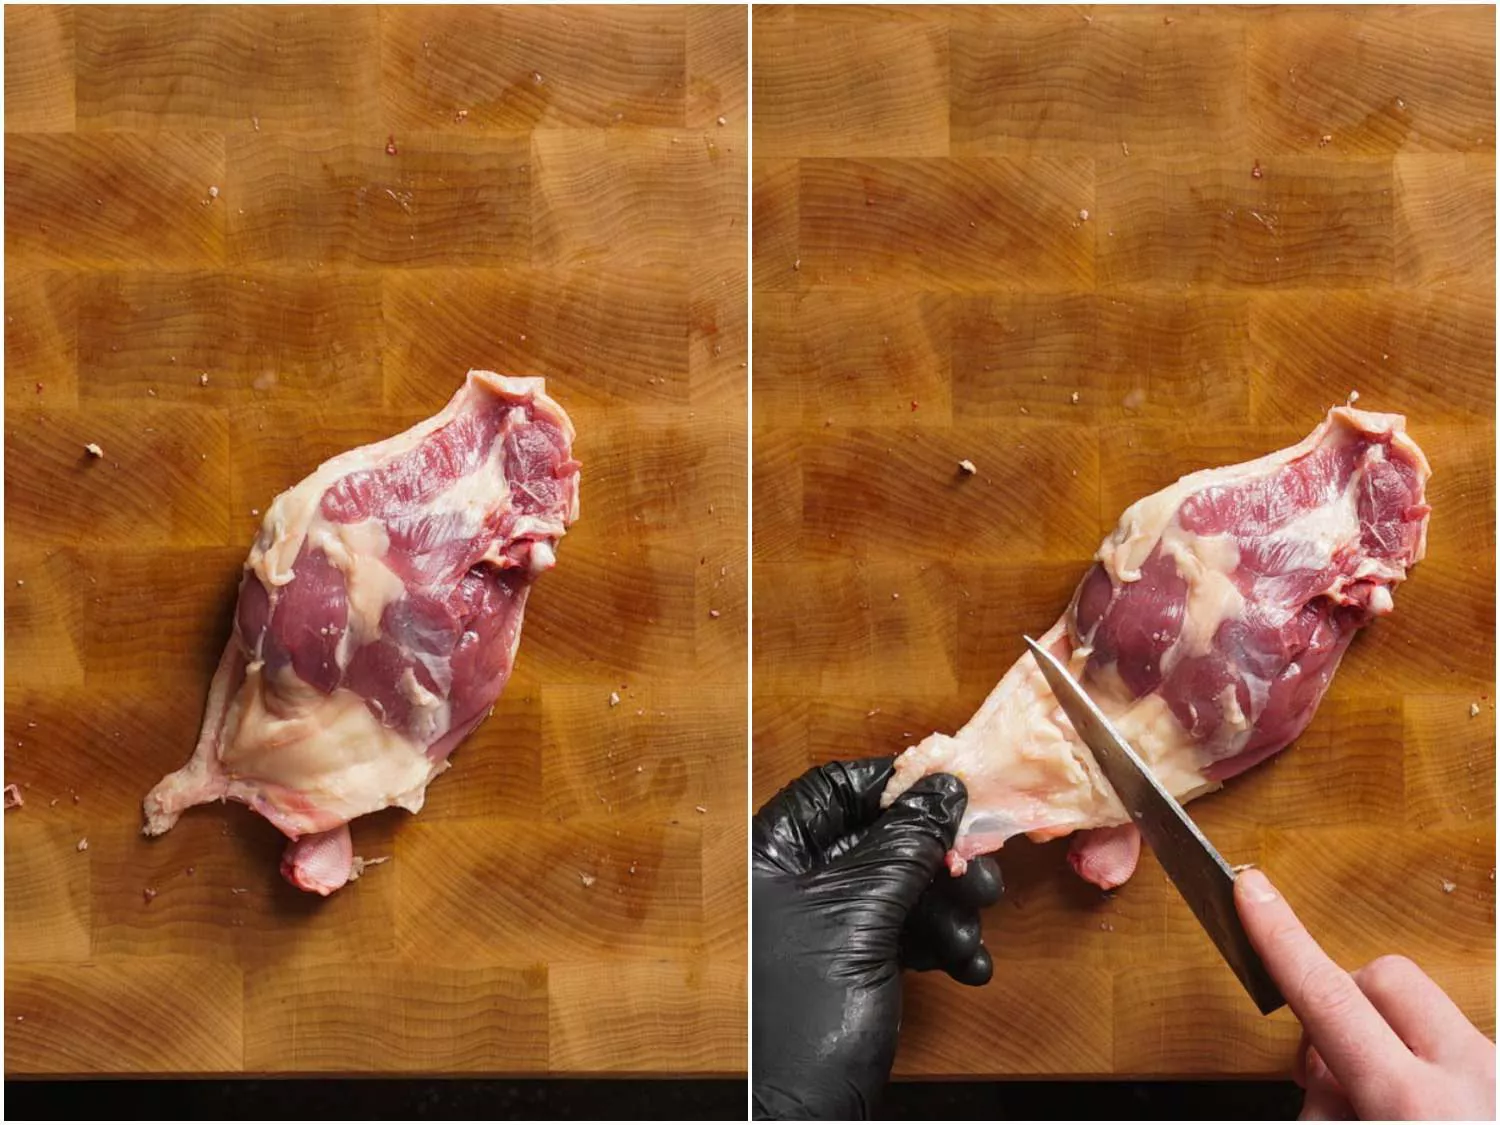
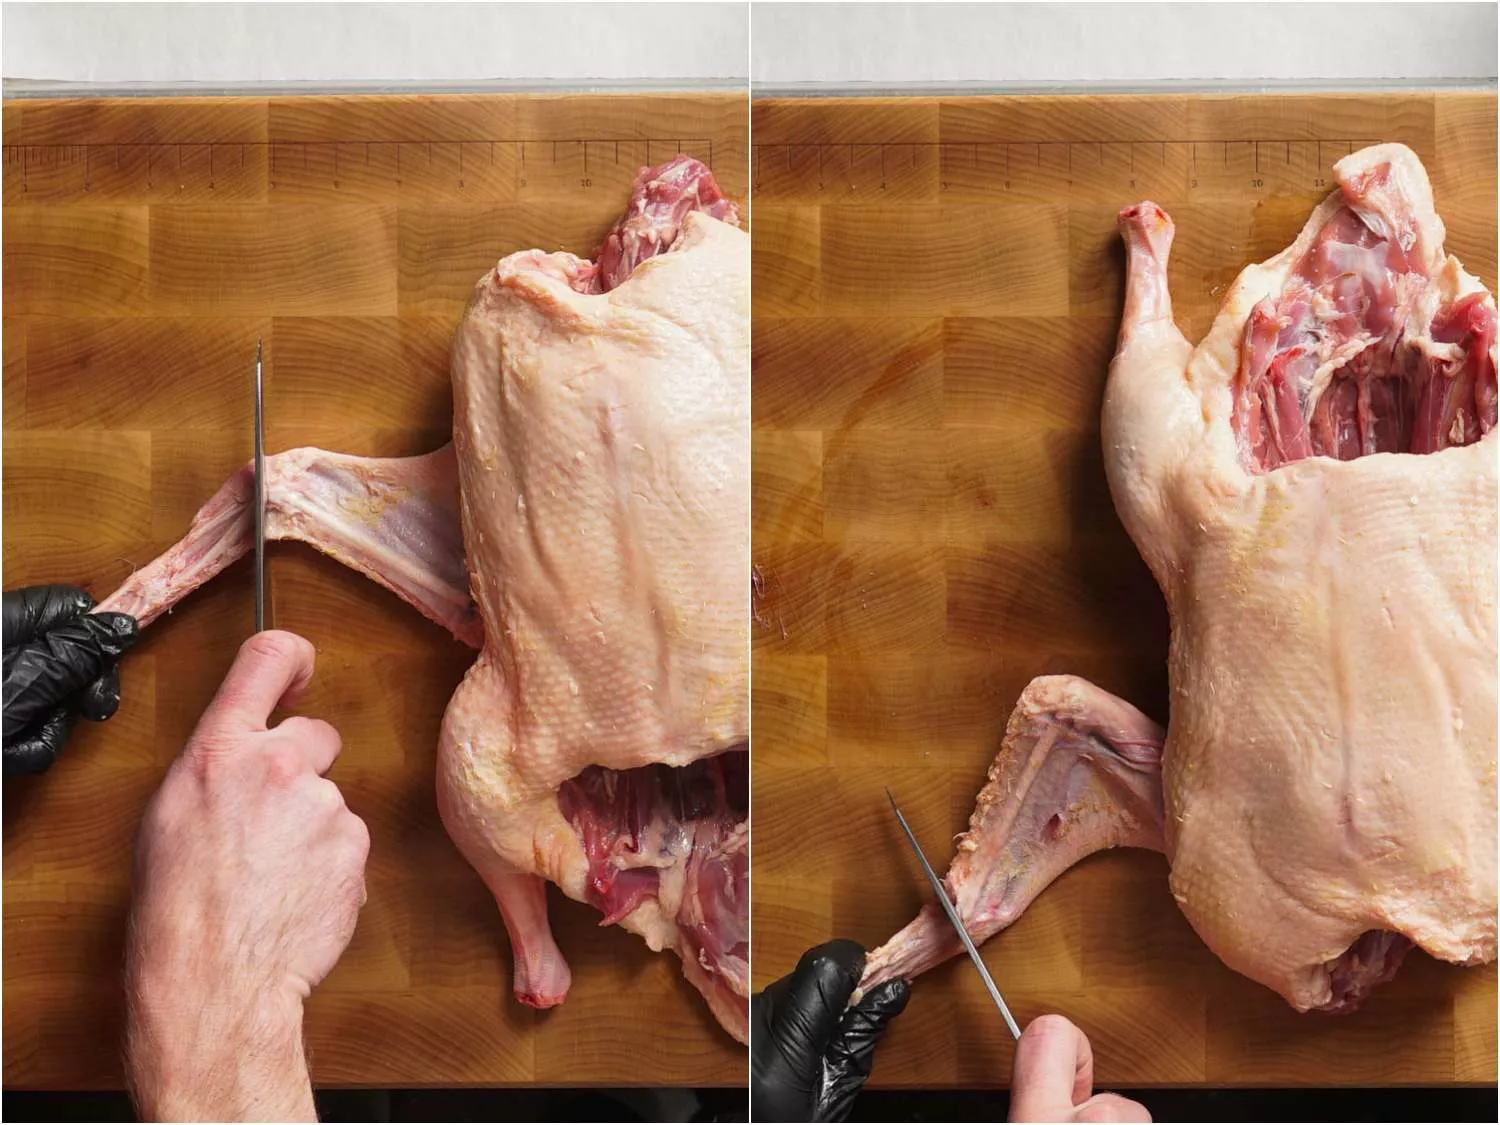
Require a moment to cut back the abundance of skin and fat from the duck legs and eliminated the spine. For the legs, there are huge pockets of fat under the skin at the highest point of the thigh and at the base where the thigh meets the drumstick.
You can undoubtedly take out these pieces of fat with your hands (likewise with all butchery, try not to involve your blade however much as could reasonably be expected; you’ll be flabbergasted by the amount you can do with your hands, because of life systems and gravity).
It’s not unexpected the situation that you will have huge overhanging bits of skin at the lower part of the duck leg quarters. These can be cut back and put something aside for delivery. Make a point to pass on sufficient skin to cover the meat, leaving around 50% of an inch or so of shade to make up for shrinkage during the confit cooking process.
For eliminating the skin and fat on the spine, slide your blade under the skin with the goal that the sharp edge is corresponding deep down, and trim away the skin and fat.